How to Build Your Own Mini Cloud Provider with Incus: A Complete Tutorial
Sophia Okonkwo
Technical Writer
Have you ever wondered what it would take to build a mini version of a cloud provider like AWS or Digital Ocean? With Incus, a powerful system container and virtual machine manager, you can create your own cloud infrastructure that efficiently runs various workloads from containers to virtual machines. This tutorial will guide you through setting up Incus, deploying containers, running AI models, and configuring multi-tenant environments—all the essential components of a cloud provider.
What is Incus and Why Use It?
Incus is an open-source system container and virtual machine manager that provides a unified interface for managing both containers and VMs. Originally a community-driven fork of Canonical's LXD, Incus offers several compelling advantages for cloud integration:
- Unified management interface for both containers and VMs
- Exceptional scalability from a single laptop to multi-node clusters
- Resource efficiency with containers sharing the host's kernel
- Flexibility to handle diverse workloads (development environments, production apps, AI models)
- Completely free and open-source with no licensing costs
Incus builds on LXC for system containers and QEMU for virtual machines, making it familiar for users of LXD or LXC. Currently, Incus runs exclusively on Linux systems, though you can use it within a Linux VM on other operating systems as we'll demonstrate.
Installing Incus on Ubuntu
Let's start by installing Incus on a fresh Ubuntu server. While the installation process involves several steps, once completed, using Incus becomes straightforward.
# Update system packages
sudo apt update

# Install required dependencies
sudo apt install -y curl gpg

# Create keyrings directory for trusted keys
sudo mkdir -p /etc/apt/keyrings

# Add the Incus repository key
curl -fsSL https://pkgs.zabbly.com/key.asc | sudo gpg --dearmor -o /etc/apt/keyrings/zabbly.gpg

# Add the Incus repository
echo "deb [signed-by=/etc/apt/keyrings/zabbly.gpg] https://pkgs.zabbly.com/incus/stable $(lsb_release -cs) main" | sudo tee /etc/apt/sources.list.d/incus.list

# Update package lists
sudo apt update

# Install Incus
sudo apt install -y incusAfter installation, verify that Incus is working correctly:
sudo incus listYou should see an empty list since no instances are running yet. Next, initialize Incus with the default configuration:
sudo incus admin initLaunching Your First Container
With Incus installed and initialized, you can now launch your first container. Let's create an Ubuntu container:
sudo incus launch ubuntu:20.04 my-containerTo access your container, execute a shell inside it:
sudo incus exec my-container -- bashYou're now inside an Ubuntu container! You can verify this by checking system directories or running commands like `cat /etc/os-release`.
Creating Virtual Machines
If you need more isolation with a dedicated kernel, Incus makes it just as easy to launch virtual machines. Use the same command with the VM flag:
sudo incus launch ubuntu:20.04 my-vm --vmNote that running VMs requires hardware virtualization support. If you're already running in a VM that doesn't support nested virtualization (common on cloud platforms or when using macOS/Windows), this command might fail.
Running an AI Model with Ollama
Let's do something more advanced by creating a container to run an AI language model using Ollama. First, create a new container:
sudo incus launch ubuntu:20.04 ollamaBefore we can install Ollama, we need to ensure our container has internet access. By default, Incus containers might not be connected to the outside network. Let's set up networking:
# Create a bridged network
sudo incus network create incusbr0

# Attach the bridge to the default profile
sudo incus profile device add default eth0 nic nictype=bridged parent=incusbr0

# Restart the container to apply changes
sudo incus restart ollamaNow let's access the container and install Ollama:
# Enter the container
sudo incus exec ollama -- bash

# Install dependencies
apt update && apt install -y curl

# Install Ollama
curl -fsSL https://ollama.ai/install.sh | shWith Ollama installed, we can run a small language model like Orca Mini:
ollama run orca-mini "Tell me a joke about cloud servers"The first run will download the model, which might take some time depending on your internet connection. Once completed, you'll have a fully functional AI service running in your container!
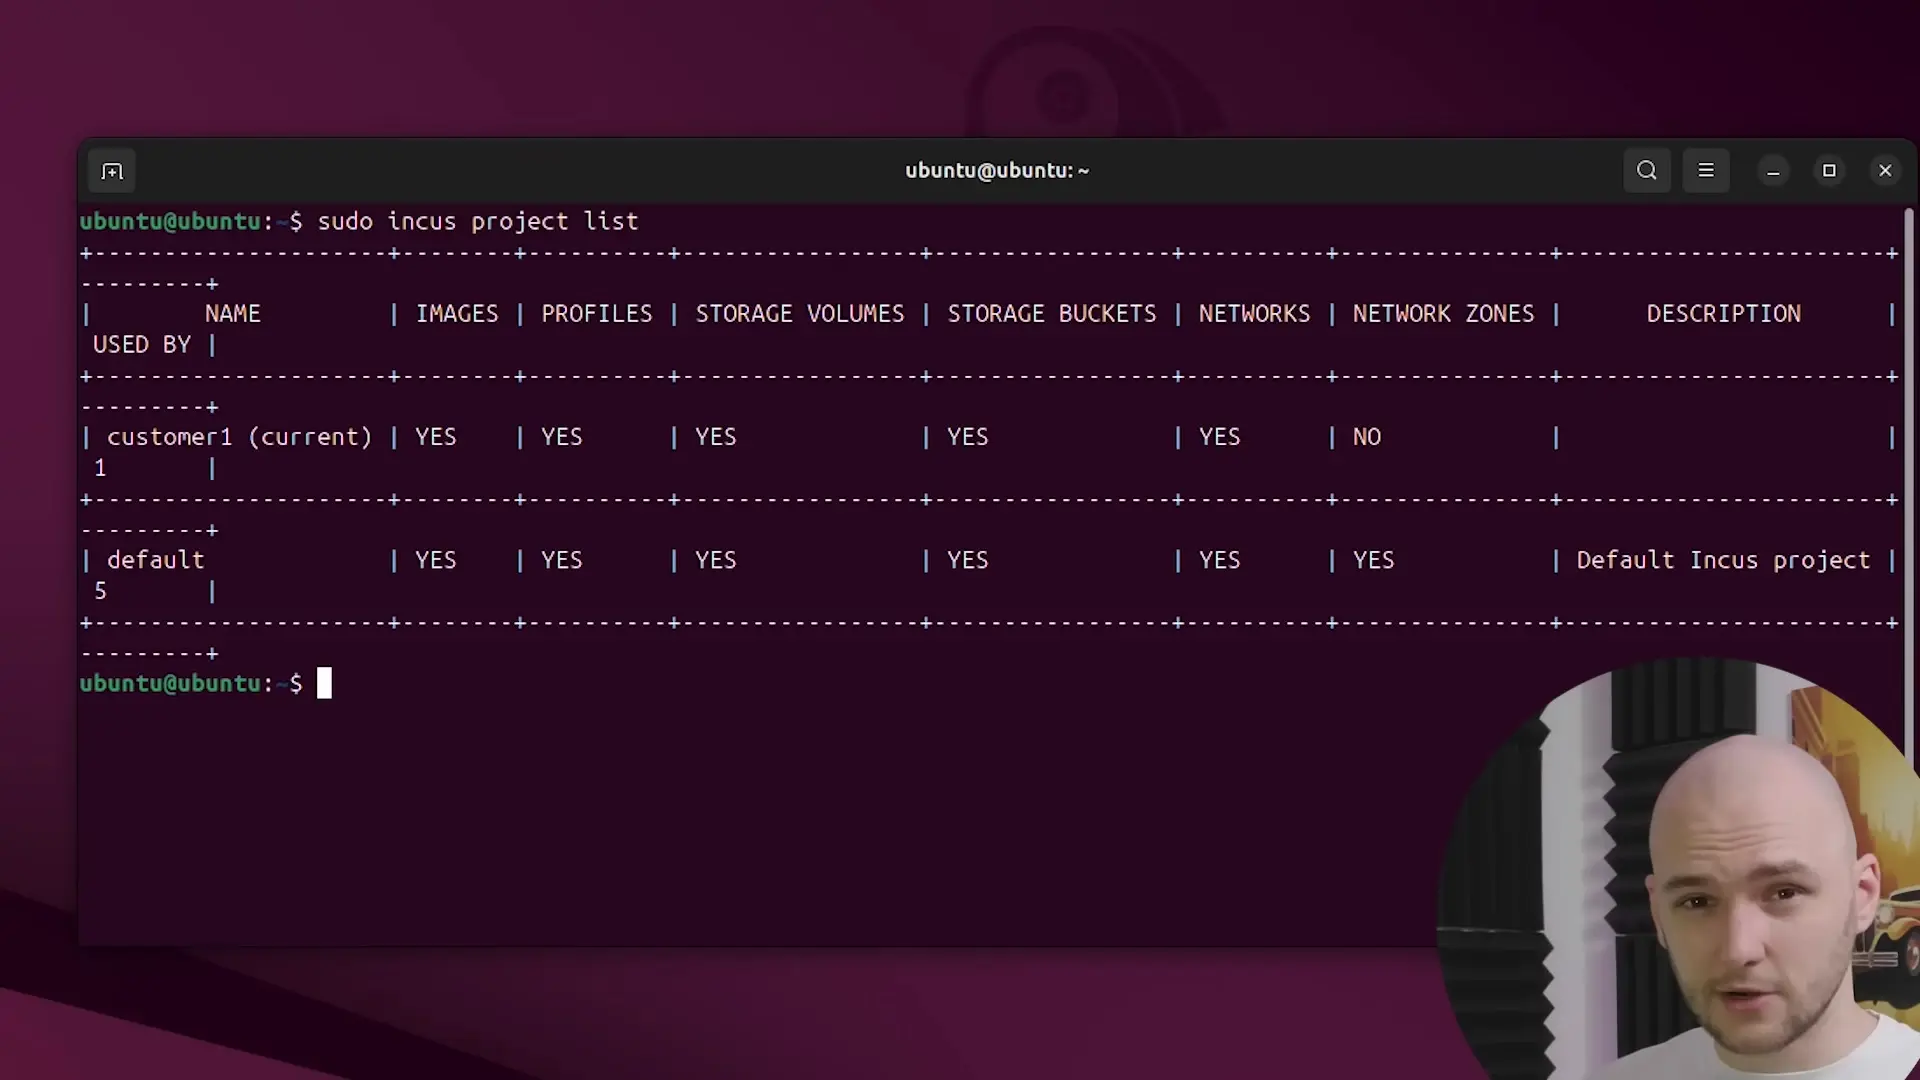
Setting Up Multi-Tenant Infrastructure
A key feature of cloud providers is multi-tenancy—the ability to host workloads for different customers with complete isolation. Incus supports this through its projects feature.
Let's create a project for an imaginary customer:
sudo incus project create customer-oneNext, we'll define which features this project will support:
sudo incus project set customer-one features.profiles=true features.networks=true features.storage.volumes=true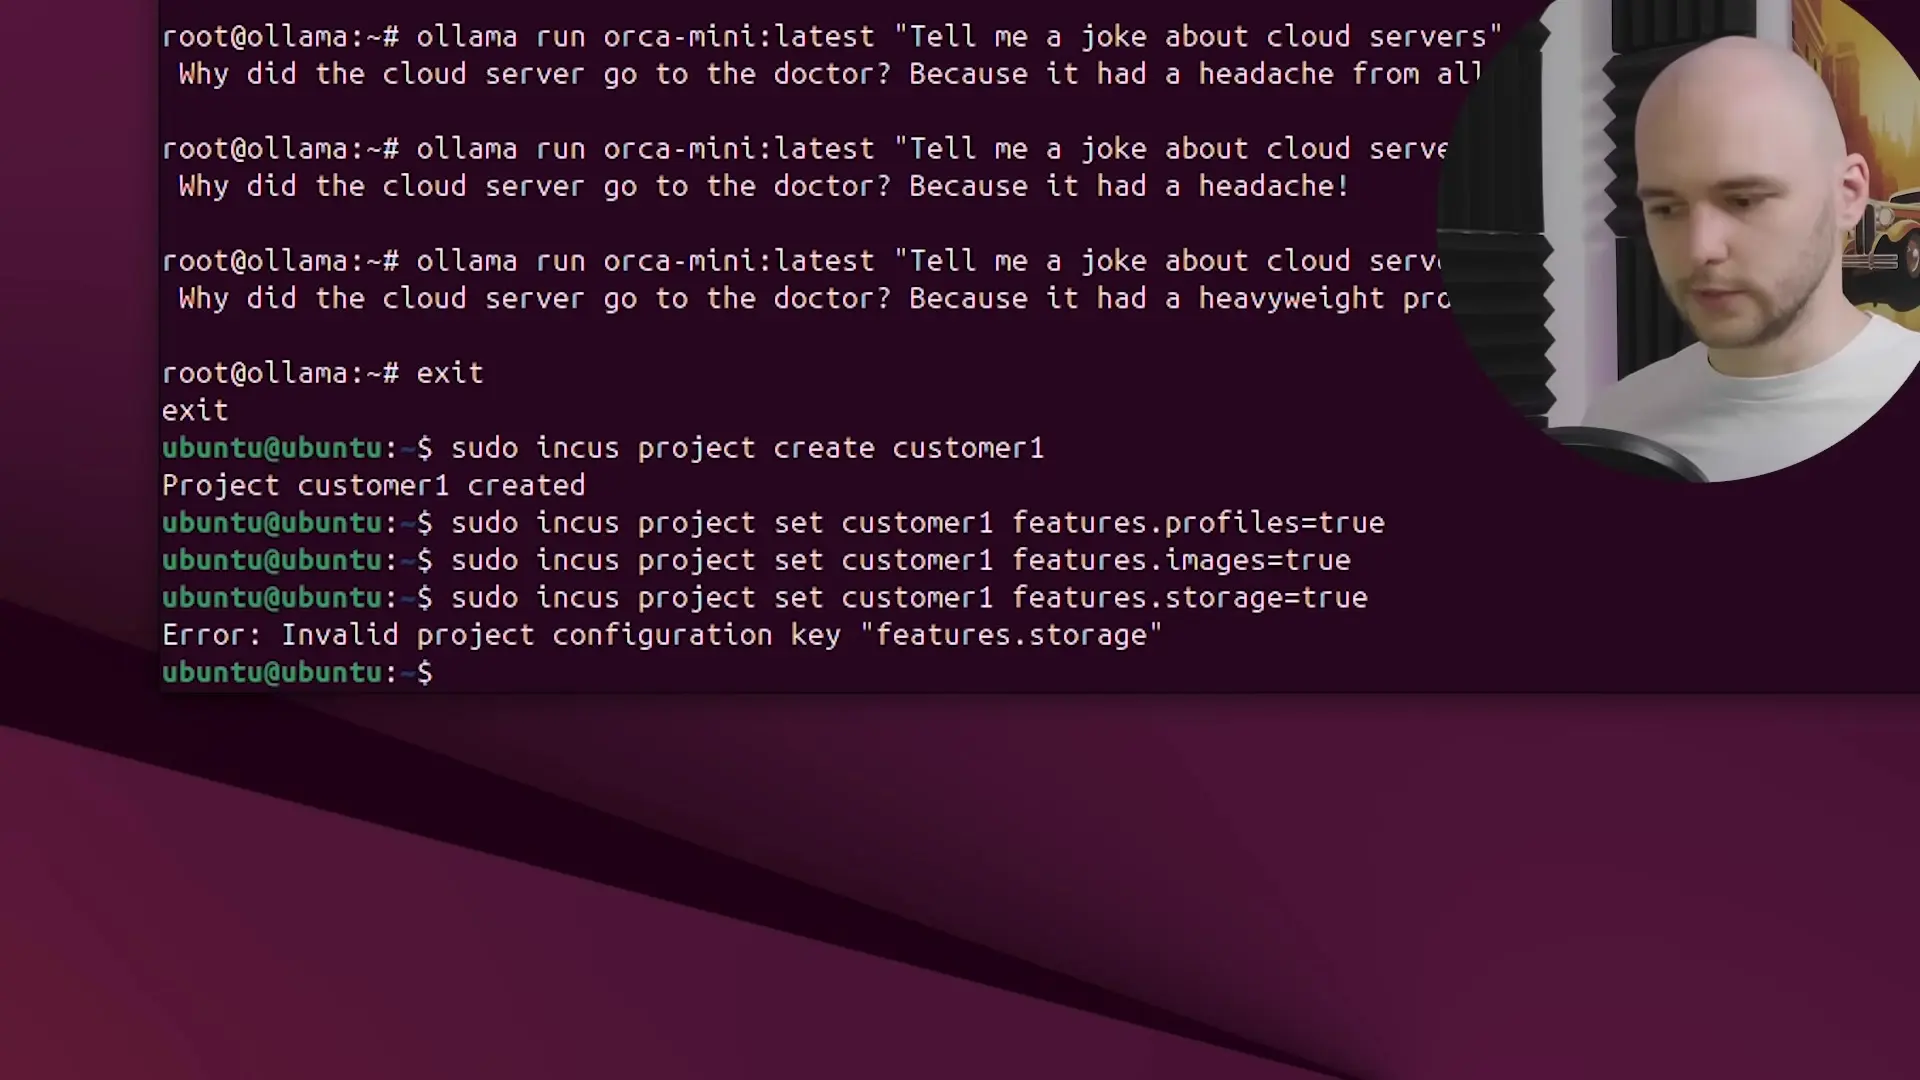
Now we can switch to this project and work within its isolated environment:
sudo incus project switch customer-oneTo prevent resource hogging, we can set resource limits for each customer:
sudo incus project set customer-one limits.cpu=4 limits.memory=8GB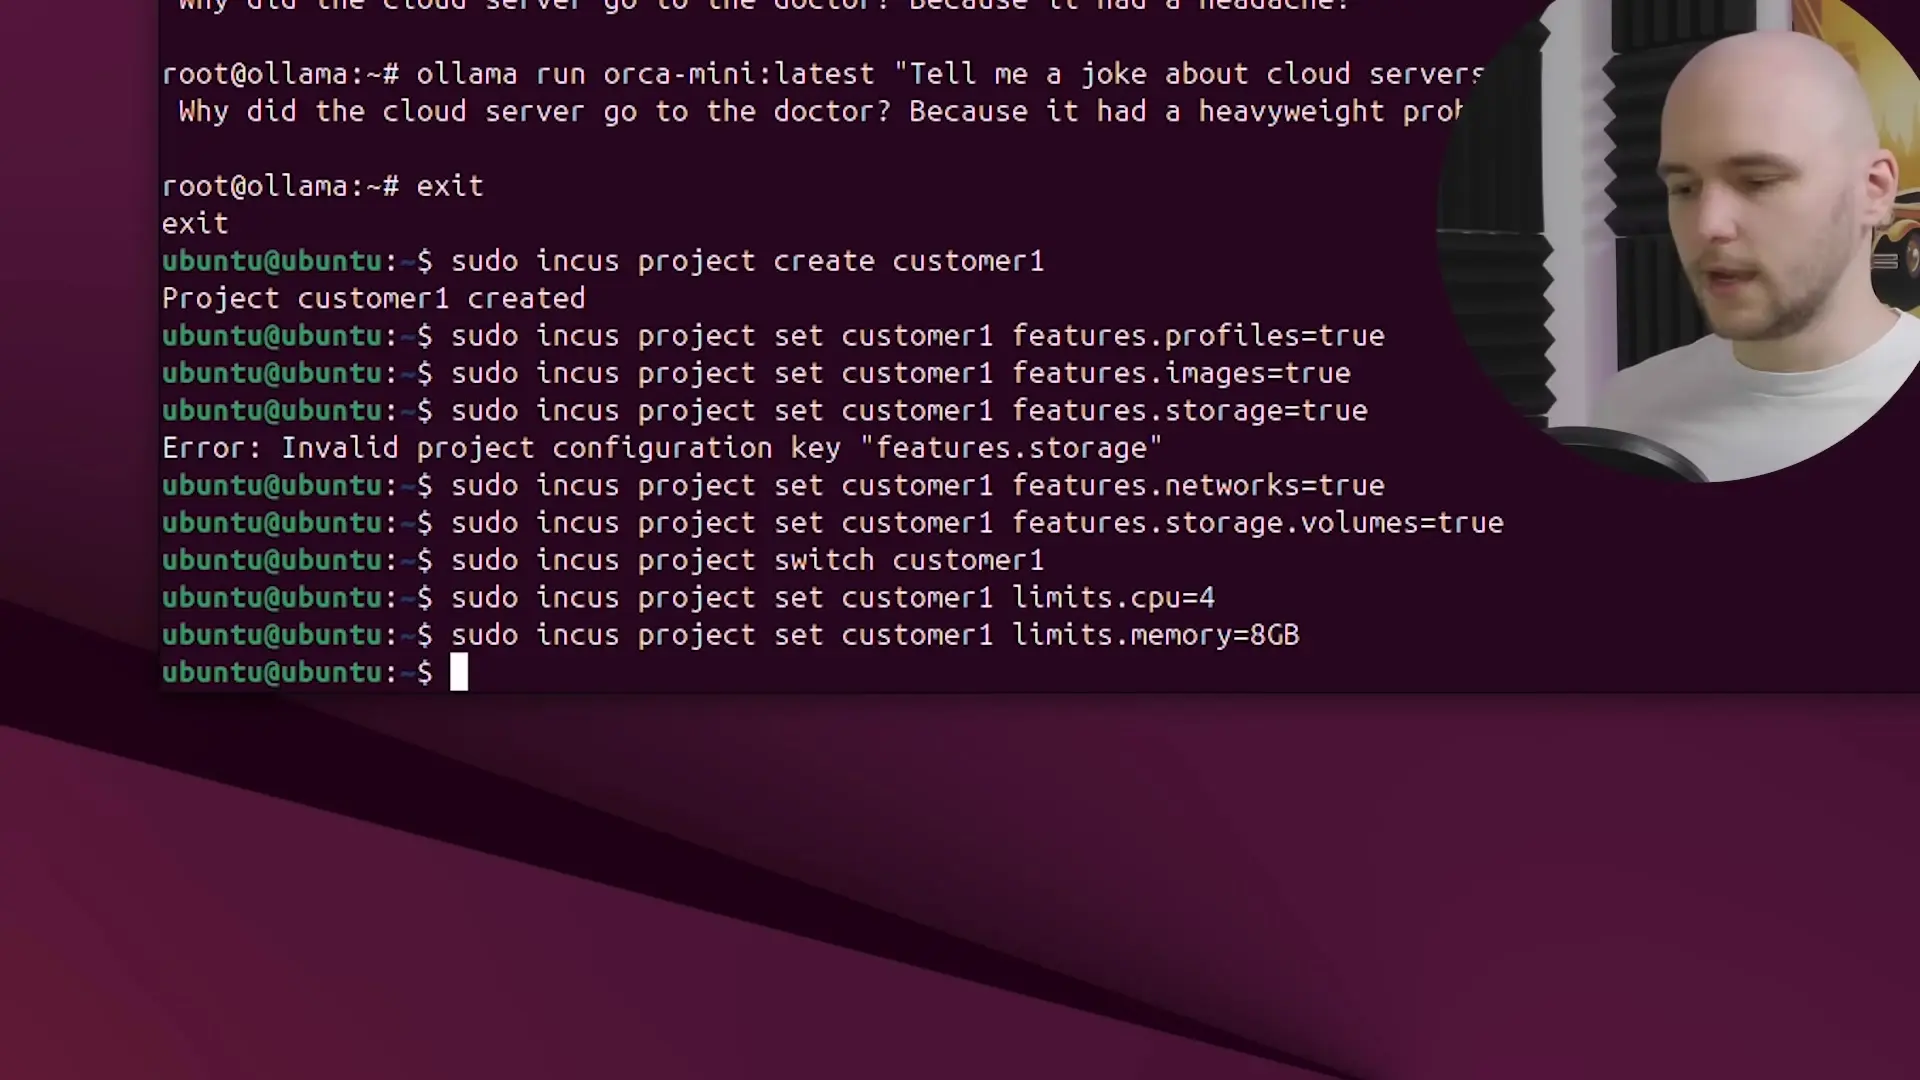
You can repeat this process for additional customers, creating a true multi-tenant cloud environment where each tenant's workloads remain isolated from others.
Expanding Your Mini Cloud Provider
From this foundation, you can expand your mini cloud provider with additional features:
- Implement OVN networking to give each instance a public IP address
- Build a web-based frontend for customers to manage their instances
- Set up automated backups for containers and VMs
- Configure monitoring and alerting for your infrastructure
- Implement authentication and access control for multiple administrators
Conclusion
In this tutorial, we've demonstrated how Incus can be used to create a mini cloud provider with many of the same capabilities as commercial offerings like AWS or Digital Ocean. We've covered installing Incus, launching containers and VMs, running AI workloads, and setting up multi-tenant isolation with resource quotas.
Incus provides a powerful, flexible foundation for building your own cloud infrastructure, whether for personal projects, development environments, or even small-scale production deployments. Its combination of container and VM management in a single tool makes it uniquely suited for cloud integration scenarios.
For those interested in exploring Incus further, the project offers a browser-based demo console that allows you to experiment without installing anything locally. This makes it easy to get familiar with the commands and capabilities before deploying on your own hardware.
Let's Watch!
Build Your Own Mini Cloud Provider with Incus in 30 Minutes
Ready to enhance your neural network?
Access our quantum knowledge cores and upgrade your programming abilities.
Initialize Training Sequence