The Complete Guide to Configuring NGINX Reverse Proxy with Node.js and Docker
Jamal Washington
Infrastructure Lead

NGINX is a powerful, versatile web server that has become an essential tool in modern web infrastructure. In this comprehensive guide, we'll explore how to configure NGINX as a reverse proxy for Node.js applications using Docker, complete with load balancing and SSL encryption. Whether you're a DevOps engineer looking to optimize your infrastructure or a developer wanting to understand how the pieces fit together, this tutorial will provide you with the knowledge and hands-on experience you need.
Understanding NGINX: More Than Just a Web Server
NGINX was originally developed as a web server software - a program that runs on a server machine and responds to browser requests. However, as the web evolved and traffic volumes increased, NGINX's role expanded significantly. Today, it serves multiple critical functions in web infrastructure.
The Evolution of Web Server Requirements
In the early days of the internet, a simple setup sufficed: a browser requested a page from a web server, which assembled and returned it. But as websites grew in popularity, handling thousands or millions of requests became impossible for a single server. This scalability challenge led to the development of more sophisticated architectures.
Enter NGINX, which evolved from a simple web server to a multifunctional tool that could handle various aspects of web traffic management. Let's explore the key functionalities that make NGINX indispensable in modern web infrastructure.
Key NGINX Functionalities
1. Load Balancing
When a website receives more traffic than a single server can handle, multiple server instances are deployed. NGINX can act as a load balancer, distributing incoming requests across these servers to ensure optimal resource utilization and prevent any single server from becoming overwhelmed.
NGINX supports various load balancing algorithms, including:
- Round Robin: Distributes requests equally in a cyclical manner
- Least Connections: Directs traffic to the server with the fewest active connections
- IP Hash: Determines which server receives the request based on the client's IP address
2. Caching
Repeatedly assembling the same content for multiple users is inefficient. NGINX can cache static content (like HTML pages, images, and videos) and serve it directly to users without hitting the application servers. This significantly reduces load on backend servers and improves response times.
For example, a news website might cache an article page after it's first assembled, then serve that cached version to subsequent visitors, dramatically reducing server load and improving performance.
3. Security Enhancement
NGINX serves as a security shield for your application servers. By exposing only the NGINX server to the public internet and keeping application servers in a private network, you significantly reduce the attack surface. This setup allows you to concentrate security efforts on a single entry point rather than securing numerous backend servers.
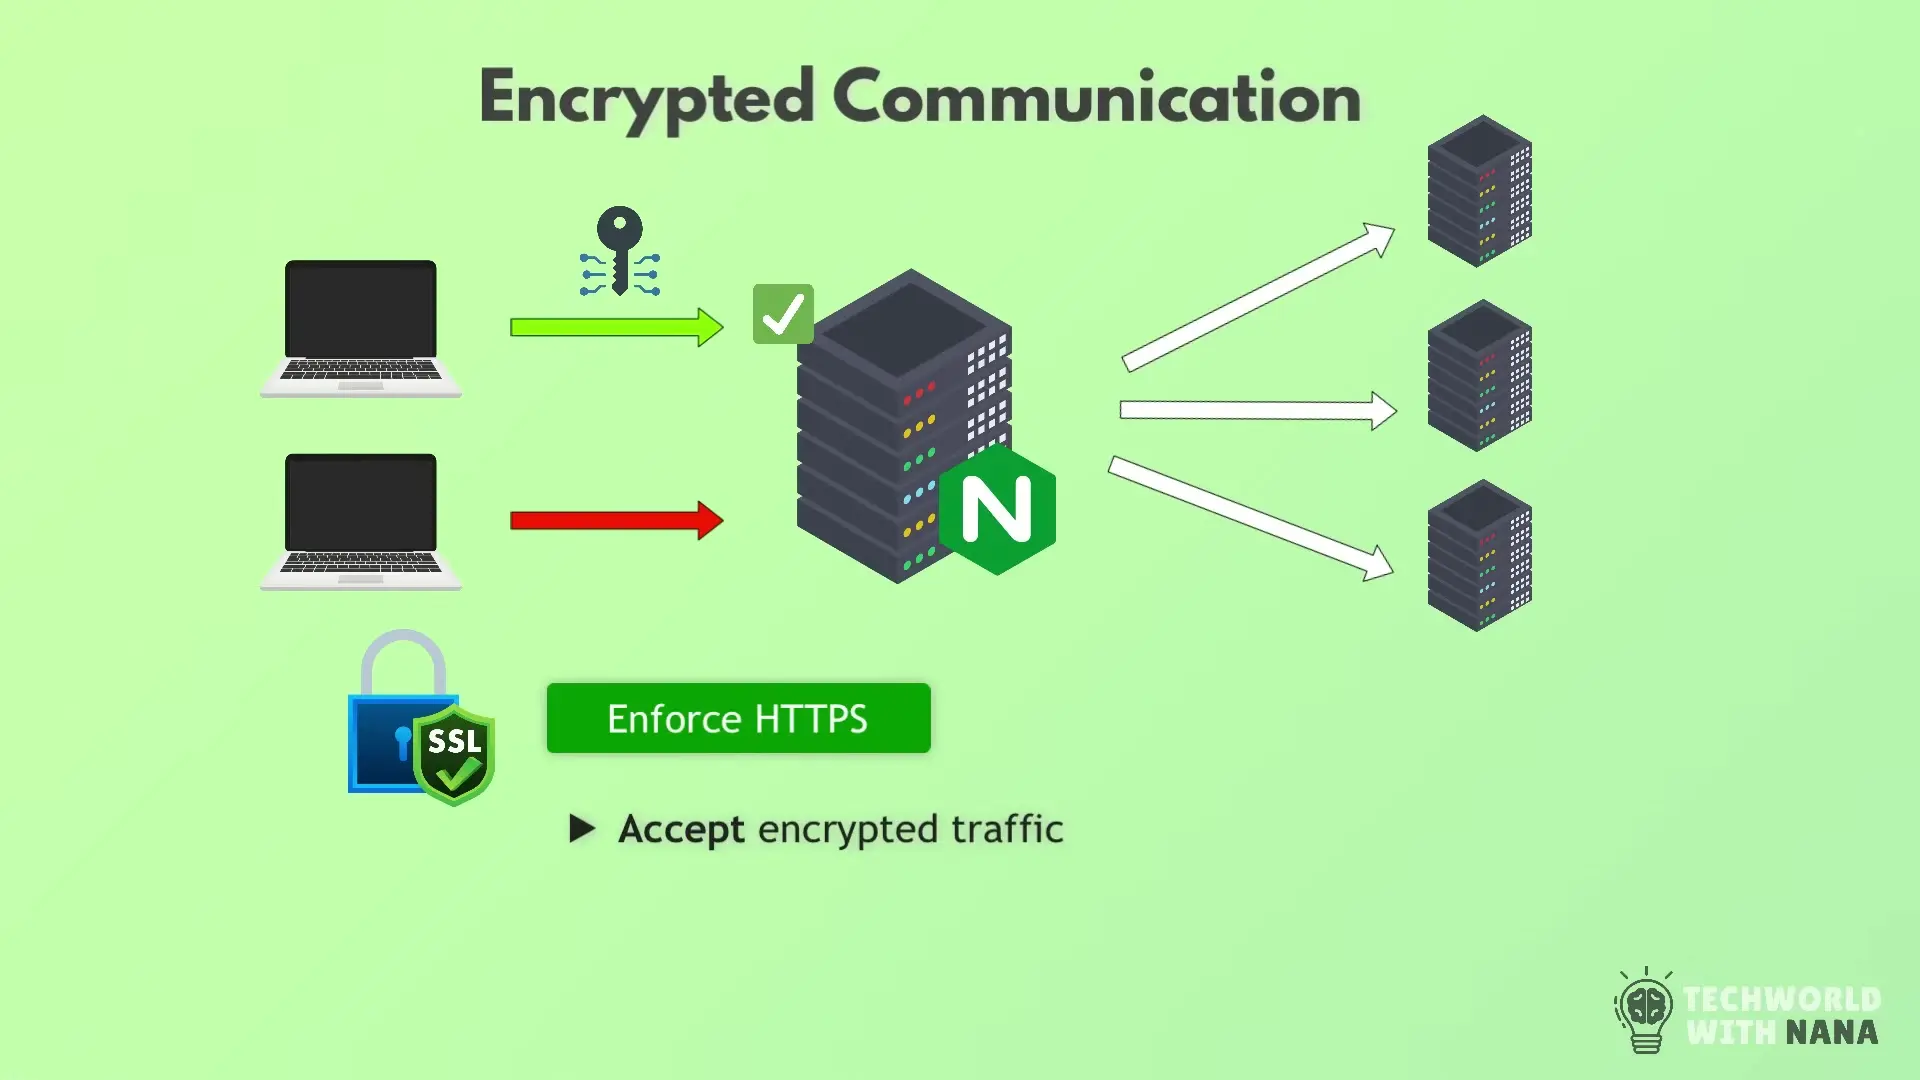
4. SSL/TLS Termination
NGINX can handle encrypted HTTPS traffic, either by terminating SSL (decrypting requests before forwarding them to backend servers) or by passing encrypted traffic through to backend servers. This capability is crucial for securing sensitive data transmission.
You can configure NGINX to reject unencrypted requests, ensuring all communication with your application is secure. This is particularly important for applications handling sensitive user data.
5. Compression
To optimize bandwidth usage and improve loading times, NGINX can compress responses before sending them to clients. This is especially valuable for large files like videos or high-resolution images, as seen in streaming services like Netflix (which uses NGINX in its infrastructure).
Hands-On Project: Setting Up NGINX Reverse Proxy with Node.js and Docker
Now that we understand the theory, let's dive into a practical implementation. We'll create a setup with multiple Node.js application instances running in Docker containers and configure NGINX as a reverse proxy to load balance between them.
Project Overview
Our project will consist of:
- A simple Node.js application that serves an HTML page
- Multiple instances of this application running in Docker containers
- NGINX configured as a reverse proxy and load balancer
- SSL/TLS encryption with a self-signed certificate
Step 1: Creating a Simple Node.js Application
First, let's create a basic Node.js application that serves an HTML page. This will be our backend service.
// app.js
const http = require('http');
const fs = require('fs');
const hostname = '0.0.0.0';
const port = 3000;

const server = http.createServer((req, res) => {
  if (req.url === '/') {
    fs.readFile('index.html', (err, data) => {
      if (err) {
        res.statusCode = 500;
        res.end('Error loading index.html');
        return;
      }
      res.statusCode = 200;
      res.setHeader('Content-Type', 'text/html');
      res.end(data);
    });
  } else {
    res.statusCode = 404;
    res.end('Not found');
  }
});

server.listen(port, hostname, () => {
  console.log(`Server running at http://${hostname}:${port}/`);
});Now, let's create a simple index.html file:
<!-- index.html -->
<!DOCTYPE html>
<html>
<head>
  <title>Node.js App</title>
  <style>
    body { font-family: Arial, sans-serif; margin: 40px; }
    h1 { color: #333; }
  </style>
</head>
<body>
  <h1>Hello from Node.js!</h1>
  <p>This page is served by a Node.js application running in a Docker container.</p>
  <p>Container ID: <span id="container-id">NODE_APP_INSTANCE</span></p>
</body>
</html>Step 2: Dockerizing the Node.js Application
Next, we'll create a Dockerfile to containerize our Node.js application:
# Dockerfile
FROM node:14-alpine

WORKDIR /app

COPY package.json .
RUN npm install

COPY . .

# Replace NODE_APP_INSTANCE with the container hostname
RUN sed -i "s/NODE_APP_INSTANCE/$(hostname)/g" index.html

EXPOSE 3000

CMD ["node", "app.js"]Create a package.json file:
{
  "name": "node-app",
  "version": "1.0.0",
  "description": "Simple Node.js application",
  "main": "app.js",
  "scripts": {
    "start": "node app.js"
  },
  "dependencies": {}
}Step 3: Creating Docker Compose Configuration
Now, let's create a docker-compose.yml file to run multiple instances of our Node.js application:
# docker-compose.yml
version: '3'

services:
  node-app-1:
    build: .
    container_name: node-app-1
    networks:
      - app-network

  node-app-2:
    build: .
    container_name: node-app-2
    networks:
      - app-network

  node-app-3:
    build: .
    container_name: node-app-3
    networks:
      - app-network

  nginx:
    image: nginx:latest
    container_name: nginx-proxy
    ports:
      - "80:80"
      - "443:443"
    volumes:
      - ./nginx/conf.d:/etc/nginx/conf.d
      - ./nginx/ssl:/etc/nginx/ssl
    depends_on:
      - node-app-1
      - node-app-2
      - node-app-3
    networks:
      - app-network

networks:
  app-network:
    driver: bridge
Step 4: Configuring NGINX as a Reverse Proxy
Create the directory structure for NGINX configuration:
mkdir -p nginx/conf.d nginx/sslNow, let's create the NGINX configuration file:
# nginx/conf.d/default.conf
upstream node_app {
    server node-app-1:3000;
    server node-app-2:3000;
    server node-app-3:3000;
}

server {
    listen 80;
    server_name localhost;

    location / {
        proxy_pass http://node_app;
        proxy_set_header Host $host;
        proxy_set_header X-Real-IP $remote_addr;
        proxy_set_header X-Forwarded-For $proxy_add_x_forwarded_for;
        proxy_set_header X-Forwarded-Proto $scheme;
    }
}This configuration sets up NGINX to listen on port 80 and forward requests to our Node.js application instances in a round-robin fashion. The `upstream` directive defines the group of servers that NGINX will proxy requests to.
Step 5: Adding SSL/TLS Support
Now, let's generate a self-signed SSL certificate and configure NGINX to use HTTPS:
# Generate self-signed certificate
openssl req -x509 -nodes -days 365 -newkey rsa:2048 \
  -keyout nginx/ssl/nginx.key -out nginx/ssl/nginx.crt \
-subj "/C=US/ST=State/L=City/O=Organization/CN=localhost"Update the NGINX configuration to support HTTPS:
# nginx/conf.d/default.conf
upstream node_app {
    server node-app-1:3000;
    server node-app-2:3000;
    server node-app-3:3000;
}

server {
    listen 80;
    server_name localhost;
    return 301 https://$host$request_uri;
}

server {
    listen 443 ssl;
    server_name localhost;

    ssl_certificate /etc/nginx/ssl/nginx.crt;
    ssl_certificate_key /etc/nginx/ssl/nginx.key;
    ssl_protocols TLSv1.2 TLSv1.3;
    ssl_prefer_server_ciphers on;

    location / {
        proxy_pass http://node_app;
        proxy_set_header Host $host;
        proxy_set_header X-Real-IP $remote_addr;
        proxy_set_header X-Forwarded-For $proxy_add_x_forwarded_for;
        proxy_set_header X-Forwarded-Proto $scheme;
    }
}This updated configuration redirects HTTP traffic to HTTPS and configures SSL with our self-signed certificate.
Step 6: Running the Application
Now that we have everything set up, let's start our application:
docker-compose up --buildOnce the containers are running, you can access your application at https://localhost. You'll see the Node.js application page, and as you refresh, the container ID should change as NGINX load balances between the three instances.
Advanced NGINX Configuration Options
Implementing Caching
To enable caching in NGINX, add the following to your configuration:
# Add to the http block or server block
proxy_cache_path /var/cache/nginx levels=1:2 keys_zone=my_cache:10m max_size=1g inactive=60m;

# Inside location block
proxy_cache my_cache;
proxy_cache_valid 200 60m;
proxy_cache_bypass $http_pragma;
proxy_cache_revalidate on;Configuring Compression
Enable compression to reduce bandwidth usage:
# Add to http block
gzip on;
gzip_comp_level 5;
gzip_min_length 256;
gzip_proxied any;
gzip_vary on;
gzip_types
  application/javascript
  application/json
  application/xml
  text/css
  text/plain
text/xml;Rate Limiting
Protect your application from abuse by implementing rate limiting:
# Add to http block
limit_req_zone $binary_remote_addr zone=mylimit:10m rate=10r/s;

# Inside location block
limit_req zone=mylimit burst=20 nodelay;Best Practices for NGINX in Production
- Keep NGINX updated to benefit from security patches and performance improvements
- Use strong SSL/TLS configurations and regularly update certificates
- Implement proper logging and monitoring to track performance and detect issues
- Configure proper timeout values to prevent resource exhaustion
- Use worker processes based on CPU cores available (usually set to auto)
- Implement proper security headers (X-Content-Type-Options, X-XSS-Protection, etc.)
- Regularly audit your NGINX configuration for security vulnerabilities
Conclusion
NGINX is a powerful tool that extends far beyond its original purpose as a web server. As a reverse proxy, it provides essential functionality for modern web applications, including load balancing, caching, security enhancement, SSL/TLS termination, and compression.
In this guide, we've walked through setting up NGINX as a reverse proxy for a Node.js application using Docker. We've covered the basic configuration as well as more advanced topics like SSL/TLS encryption. By following this tutorial, you've gained practical experience with a technology stack that powers many of the world's most popular websites.
Understanding how these components work together is valuable knowledge for any developer or DevOps engineer. As you continue to explore NGINX, you'll discover even more ways to optimize and secure your web applications.
Let's Watch!
Ultimate Guide: Setting Up NGINX Reverse Proxy with Node.js and Docker
Ready to enhance your neural network?
Access our quantum knowledge cores and upgrade your programming abilities.
Initialize Training Sequence