How Warp Terminal's MCP Support Transforms It Into the Ultimate Developer Command Line Tool
Priya Narayan
Systems Architect

The Warp Terminal has emerged as a revolutionary command-line interface that's redefining developer workflows with its cutting-edge features. Among its latest innovations, MCP (Machine Coding Protocol) support stands out as a game-changing addition that puts Warp ahead of other terminal applications. This comprehensive guide explores how Warp Terminal's MCP integration works and why it deserves a place in your development toolkit.

What Makes Warp Terminal Special?
Warp Terminal isn't just another command-line interface. It represents a complete reimagining of what a modern terminal should be, with features that blend traditional command-line power with next-generation AI capabilities. Before diving into the MCP support specifically, it's worth highlighting what makes Warp Terminal stand out from conventional terminals:
- Seamless LLM (Large Language Model) integration for AI-assisted coding
- An intelligent agent that can make codebase-wide changes
- Intuitive, modern user interface with blocks for command organization
- Cloud synchronization through Warp Drive for settings and configurations
- Multi-platform support across major operating systems
- Advanced search and command history navigation
Understanding MCP Support in Warp Terminal
Machine Coding Protocol (MCP) represents a significant advancement in how developers interact with AI tools. At the time of writing, Warp Terminal's MCP support is available in the Warp Preview version, which supports all major operating systems including Windows, macOS, and Linux distributions.
The MCP integration in Warp Terminal allows developers to connect to various MCP servers, each providing specialized AI-powered tools that can assist with coding tasks, generate applications, and streamline development workflows. This feature positions Warp Terminal as not just a command execution environment but a comprehensive development assistant.
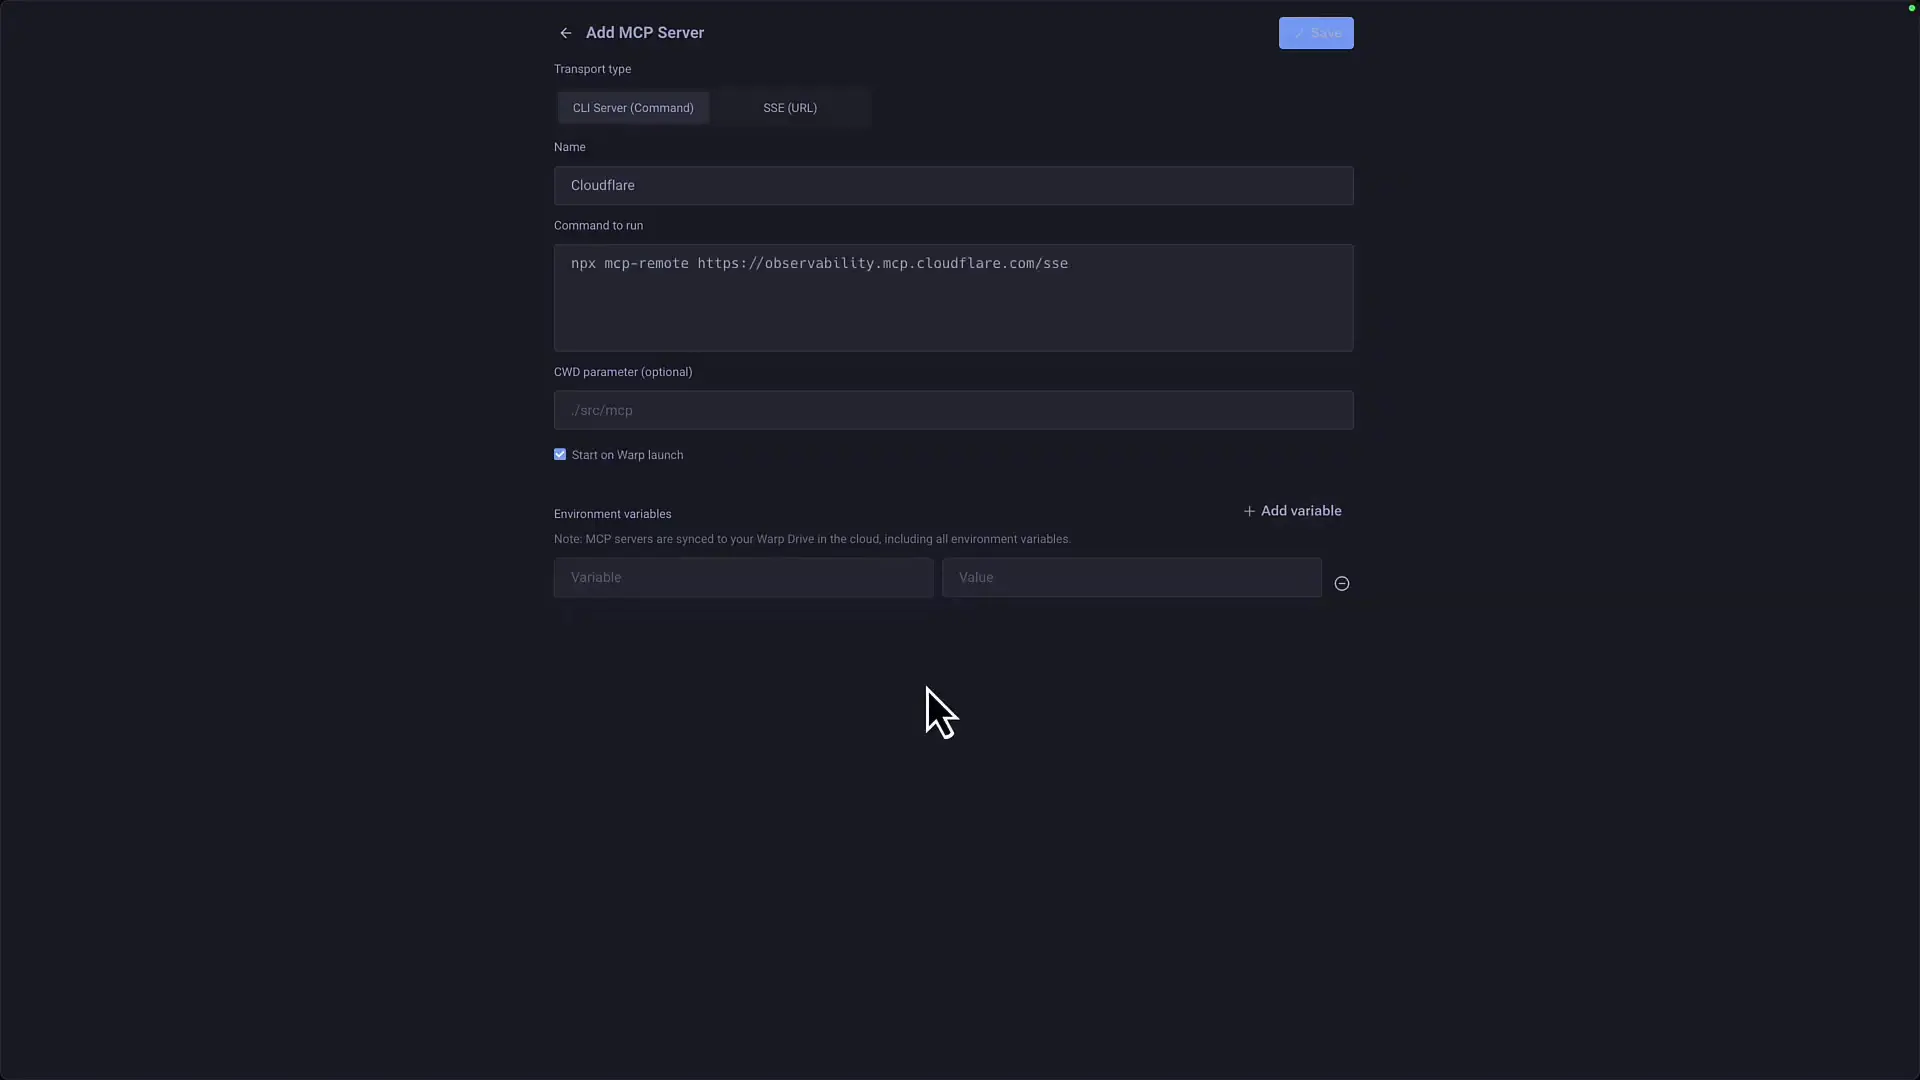
Setting Up MCP Servers in Warp Terminal
Configuring MCP servers in Warp Terminal is straightforward. Here's how to get started with the Warp Terminal setup for MCP support:
- Install Warp Preview, which currently houses the MCP functionality
- Access MCP servers through the main interface or by navigating to Settings > AI
- Add a new MCP server by providing a name and command configuration
- Configure environment variables as needed for authentication
- Set startup preferences, including the option to launch the server when Warp starts
One of the standout features of Warp Terminal's MCP implementation is the ability to automatically start servers when Warp launches. This functionality isn't commonly found in other MCP clients and ensures your AI tools are ready whenever you need them.
Additionally, Warp Terminal's security features ensure that your authentication credentials and environment variables are handled safely, making the Warp Terminal security aspect robust for developers working with sensitive codebases or private repositories.
Practical Example: Building a Game with Warp Terminal and MCP
To demonstrate the power of Warp Terminal's MCP support, let's examine a practical example: creating a Rock-Paper-Scissors game using Vite, React, and TypeScript with Tailwind CSS and Shadcn UI components.
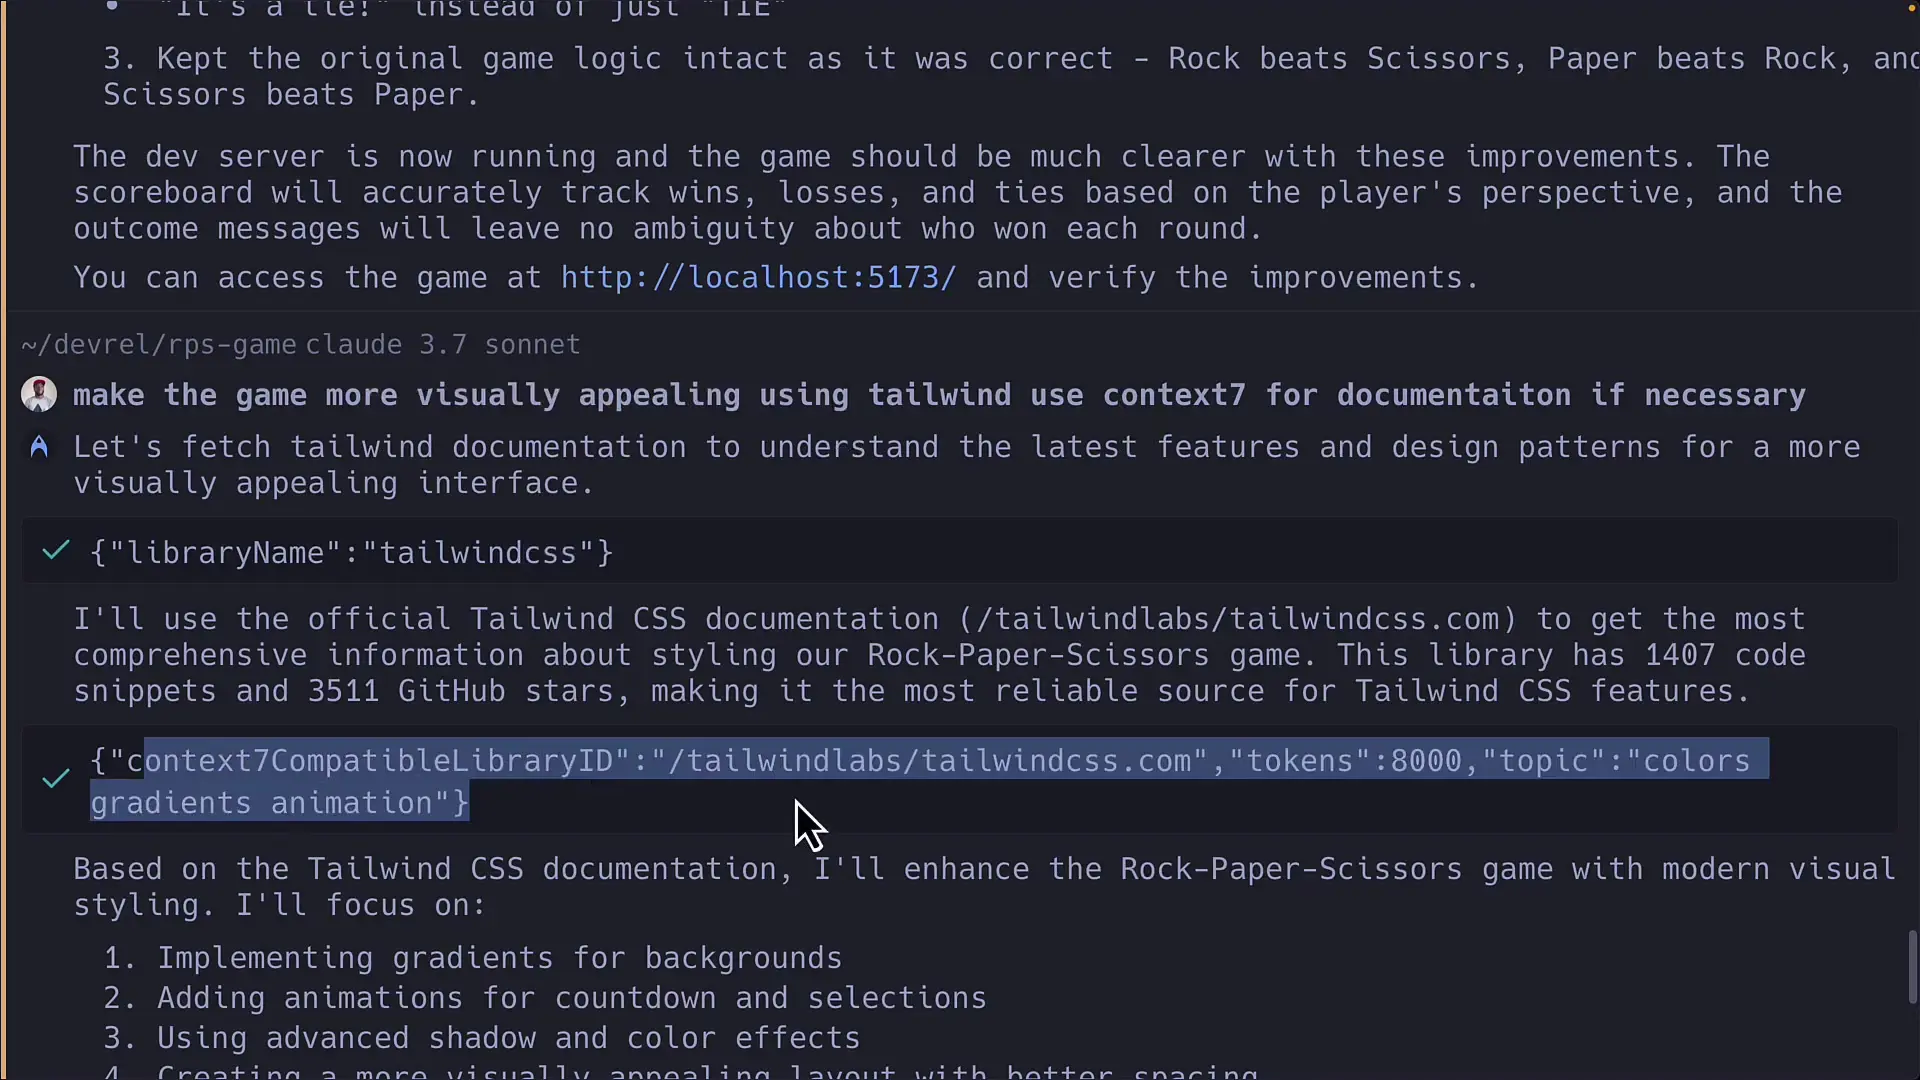
The workflow using Warp Terminal's MCP support involves:
- Specifying the project requirements through a natural language prompt
- The MCP server (in this case, using both Context 7 and Cloudflare) processes the request
- The system generates a comprehensive plan for implementing the game
- Code is generated with proper TypeScript typing, React components, and styling
- The application is scaffolded with proper project structure and dependencies
What's particularly impressive is how the Warp system plugin handles the integration between different technologies. In our example, it correctly implemented Tailwind configuration, imported Shadcn UI components, and structured the application following modern best practices.
// Example of generated component with Tailwind CSS
import { useState, useEffect } from 'react';
import { Button } from './ui/button';

type Choice = 'rock' | 'paper' | 'scissors';
type GameResult = 'win' | 'lose' | 'draw' | null;

export default function Game() {
  const [playerChoice, setPlayerChoice] = useState<Choice | null>(null);
  const [computerChoice, setComputerChoice] = useState<Choice | null>(null);
  const [result, setResult] = useState<GameResult>(null);
  const [score, setScore] = useState({ player: 0, computer: 0 });

  // Game logic implementation...

  return (
    <div className="flex flex-col items-center justify-center min-h-screen bg-gradient-to-b from-slate-900 to-slate-800 text-white p-4">
      <h1 className="text-4xl font-bold mb-8">Rock Paper Scissors</h1>
      {/* Game UI components */}
    </div>
  );
}Current Limitations and Future Improvements
While Warp Terminal's MCP support is impressive, there are some areas for improvement that would enhance the developer experience:
- JSON configuration support: Currently, Warp Terminal requires command-line configurations for MCP servers, whereas many MCP servers provide JSON examples in their documentation
- Authentication handling: Some authentication methods work better with the CLI transport option than with SSE (Server-Sent Events)
- More detailed error reporting for failed connections
- Enhanced documentation specific to different MCP server integrations
It's worth noting that since MCP support is currently in preview mode, these limitations are likely to be addressed in future updates as the Warp Terminal team refines the implementation.
Why Warp Terminal's MCP Support Stands Out
The implementation of MCP in Warp Terminal offers several advantages that set it apart from other terminal applications and even dedicated MCP clients:
- Seamless integration with Warp's existing AI capabilities
- The ability to manage multiple MCP servers from a single interface
- Comprehensive logging for debugging and troubleshooting
- Cloud synchronization of MCP configurations through Warp Drive
- Auto-start capabilities for MCP servers
- Cross-platform support ensuring consistent experience across operating systems
Getting Started with Warp Terminal and MCP
If you're interested in exploring Warp Terminal's MCP capabilities, here's a quick guide to get started:
- Download and install Warp Preview from the official website
- Navigate to the MCP servers section in the interface or through Settings > AI
- Add popular MCP servers like Context 7, Cloudflare Workers AI, or Anthropic Claude
- Configure necessary authentication tokens and environment variables
- Start experimenting with prompts to generate code, create applications, or solve development problems
The Warp Terminal setup process is intuitive, with a clean interface that makes configuring even complex MCP servers straightforward. The Warp system plugin architecture ensures that new capabilities can be added over time, making this a future-proof addition to your development toolkit.
Conclusion: Is Warp Terminal Now the Ultimate Developer Tool?
With the addition of MCP support, Warp Terminal has positioned itself as perhaps the most comprehensive terminal application for modern developers. By combining traditional terminal functionality with cutting-edge AI capabilities, Warp offers a unique value proposition that addresses the evolving needs of software development.
While there are still some refinements to be made to the MCP implementation, the foundation is solid and already provides significant productivity benefits. The ability to seamlessly integrate AI assistance into your command-line workflow represents a paradigm shift in how developers interact with their tools.
For developers looking to stay at the forefront of productivity and leverage AI in their daily workflows, Warp Terminal with its MCP support is definitely worth exploring. As the feature moves from preview to general availability, we can expect even more robust capabilities that will further cement Warp's position as a leader in developer tools.
Let's Watch!
Warp Terminal's MCP Support Makes It the Ultimate Developer Tool in 2023
Ready to enhance your neural network?
Access our quantum knowledge cores and upgrade your programming abilities.
Initialize Training Sequence