How to Build Your First Cross-Platform Desktop Application with Electron.js
Sophia Okonkwo
Technical Writer
Electron.js has revolutionized desktop application development by allowing developers to build cross-platform apps using familiar web technologies. If you've been wanting to create desktop applications but were intimidated by platform-specific languages, Electron offers a perfect solution by leveraging your existing HTML, CSS, and JavaScript skills. In this tutorial, we'll walk through building a simple audio player desktop application from scratch.
What is Electron.js?
Electron is an open-source framework that enables developers to build cross-platform desktop applications using web technologies. Created by GitHub, it combines Chromium (which powers Google Chrome) and Node.js into a single runtime, allowing your web code to access native desktop functionalities. Popular applications like Visual Studio Code, Slack, Discord, and Figma are built using Electron.
Setting Up Your Electron Project
Let's start by creating a new project. Open your terminal and run the following commands to initialize a new npm project and install Electron:
npm init -y
npm install electron --save-devThis creates a package.json file and installs Electron as a development dependency. Next, we'll need to create our main application file.
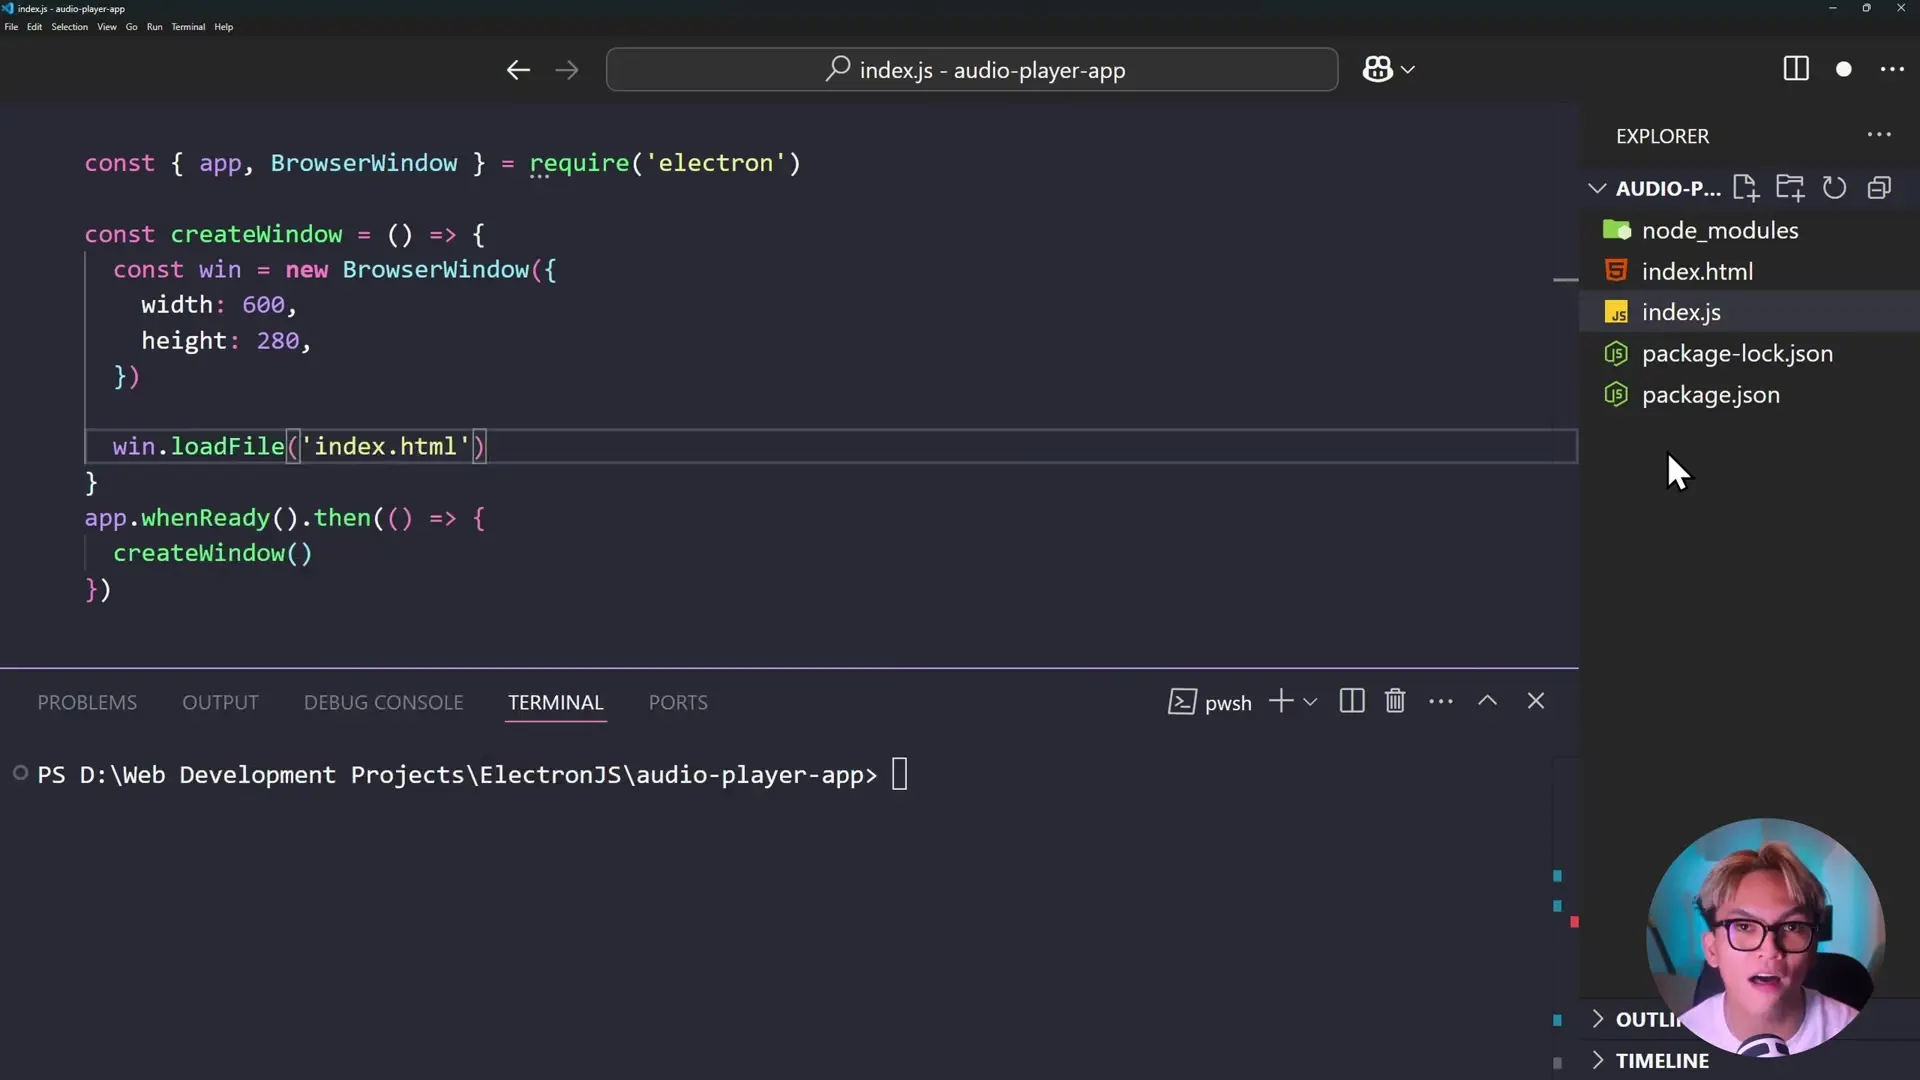
Creating the Main Process File
Create a file named index.js in your project root. This will be the entry point for your Electron application:
const { app, BrowserWindow } = require('electron');

function createWindow() {
  const win = new BrowserWindow({
    width: 600,
    height: 280,
    autoHideMenuBar: false,
    webPreferences: {
      preload: path.join(__dirname, 'preload.js')
    }
  });

  win.loadFile('index.html');
}

app.whenReady().then(() => {
  createWindow();
});Now, let's update our package.json to add a start script that will launch our Electron app:
{
  "scripts": {
    "start": "electron ."
  }
}
Creating the User Interface
Create an index.html file in your project root with the following content:
<!DOCTYPE html>
<html>
<head>
  <title>Audio Player App</title>
  <style>
    body {
      font-family: Arial, sans-serif;
      padding: 20px;
      background-color: #f5f5f5;
    }
    .container {
      max-width: 500px;
      margin: 0 auto;
      background: white;
      padding: 20px;
      border-radius: 8px;
      box-shadow: 0 2px 10px rgba(0,0,0,0.1);
    }
    .controls {
      display: flex;
      gap: 10px;
      margin-bottom: 15px;
    }
    button {
      padding: 10px 15px;
      background: #4CAF50;
      color: white;
      border: none;
      border-radius: 4px;
      cursor: pointer;
    }
    .time-display {
      font-family: monospace;
      font-size: 14px;
      margin-top: 10px;
    }
  </style>
</head>
<body>
  <div class="container">
    <h2>Simple Audio Player</h2>
    <div class="controls">
      <button id="openFileBtn">Open File</button>
      <button id="playBtn">Play</button>
    </div>
    <div id="timeDisplay" class="time-display">00:00 / 00:00</div>
  </div>
  <script src="./scripts/app.js"></script>
</body>
</html>Adding Interprocess Communication with Preload Scripts
Electron uses a multi-process architecture where the main process (index.js) and renderer process (web page) run separately. To enable secure communication between these processes, we'll create a preload script:
// preload.js
const { contextBridge, ipcRenderer } = require('electron');

contextBridge.exposeInMainWorld('electronAPI', {
  openFile: () => ipcRenderer.invoke('dialog:openFile')
});Now, update the index.js file to handle the IPC (Inter-Process Communication) events:
const { app, BrowserWindow, dialog, ipcMain } = require('electron');
const path = require('path');
function createWindow() {
const win = new BrowserWindow({
width: 600,
height: 280,
autoHideMenuBar: true, // Hide the menu bar
webPreferences: {
preload: path.join(__dirname, 'preload.js')
}
});
win.loadFile('index.html');
}
app.whenReady().then(() => {
createWindow();
// Handle file dialog open request
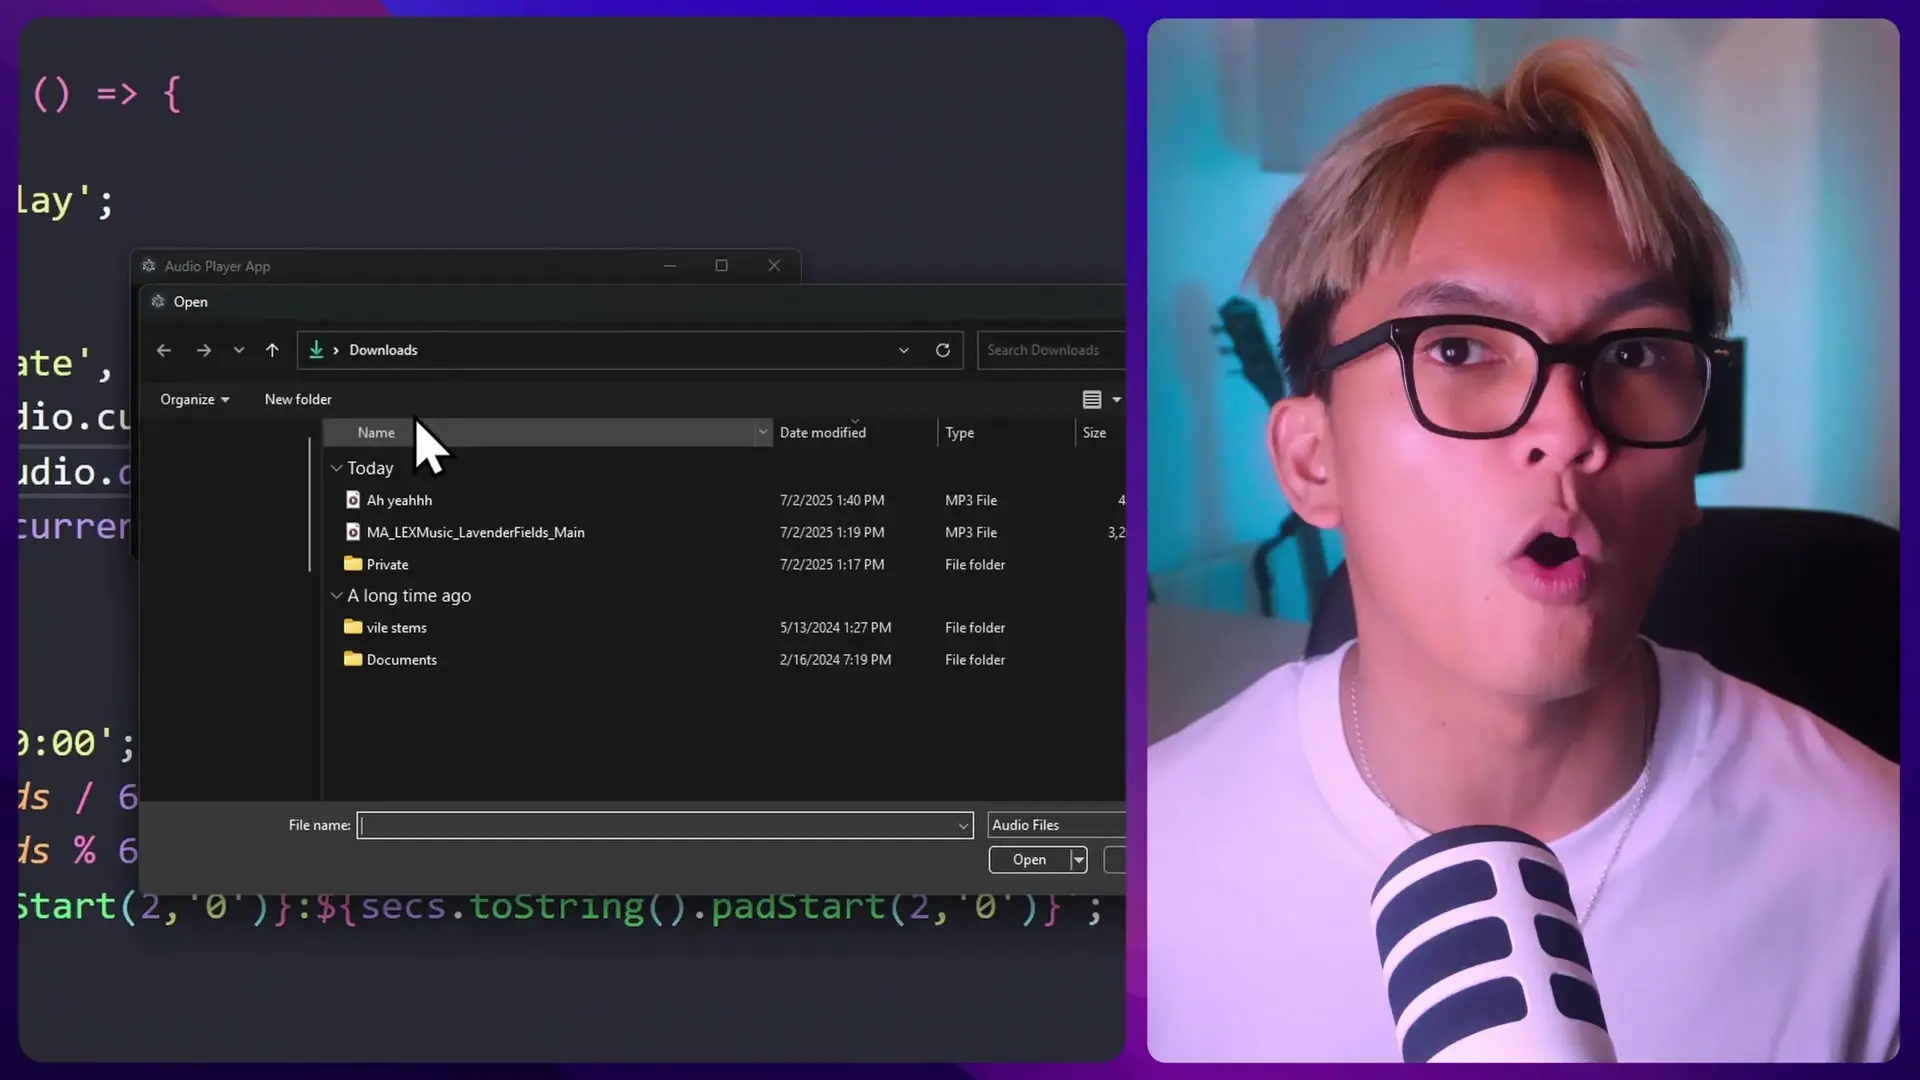
ipcMain.handle('dialog:openFile', async () => {
const { canceled, filePaths } = await dialog.showOpenDialog({
properties: ['openFile'],
filters: [{ name: 'Audio', extensions: ['mp3', 'wav', 'ogg', 'm4a'] }]
});
if (!canceled) {
return filePaths[0];
}
});
});Implementing the Audio Player Functionality
Create a directory called 'scripts' and inside it, create app.js with the following code:
// scripts/app.js
const openFileBtn = document.getElementById('openFileBtn');
const playBtn = document.getElementById('playBtn');
const timeDisplay = document.getElementById('timeDisplay');

let audio = new Audio();
let isPlaying = false;

// Open file button click event
openFileBtn.addEventListener('click', async () => {
  const filePath = await window.electronAPI.openFile();

  if (filePath) {
    audio.src = filePath;
    audio.load();
    playBtn.textContent = 'Play';
    isPlaying = false;
    updateTimeDisplay();
  }
});

// Play button click event
playBtn.addEventListener('click', () => {
  if (isPlaying) {
    audio.pause();
    playBtn.textContent = 'Play';
  } else {
    audio.play();
    playBtn.textContent = 'Pause';
  }
});

// Update button state when audio plays or pauses
audio.addEventListener('play', () => {
  isPlaying = true;
  playBtn.textContent = 'Pause';
});

audio.addEventListener('pause', () => {
  isPlaying = false;
  playBtn.textContent = 'Play';
});

// Update time display
function updateTimeDisplay() {
  const formatTime = (seconds) => {
    const mins = Math.floor(seconds / 60);
    const secs = Math.floor(seconds % 60);
    return `${mins.toString().padStart(2, '0')}:${secs.toString().padStart(2, '0')}`;
  };

  if (audio.readyState > 0) {
    timeDisplay.textContent = `${formatTime(audio.currentTime)} / ${formatTime(audio.duration)}`;
  } else {
    timeDisplay.textContent = '00:00 / 00:00';
  }
}

audio.addEventListener('timeupdate', updateTimeDisplay);
audio.addEventListener('loadedmetadata', updateTimeDisplay);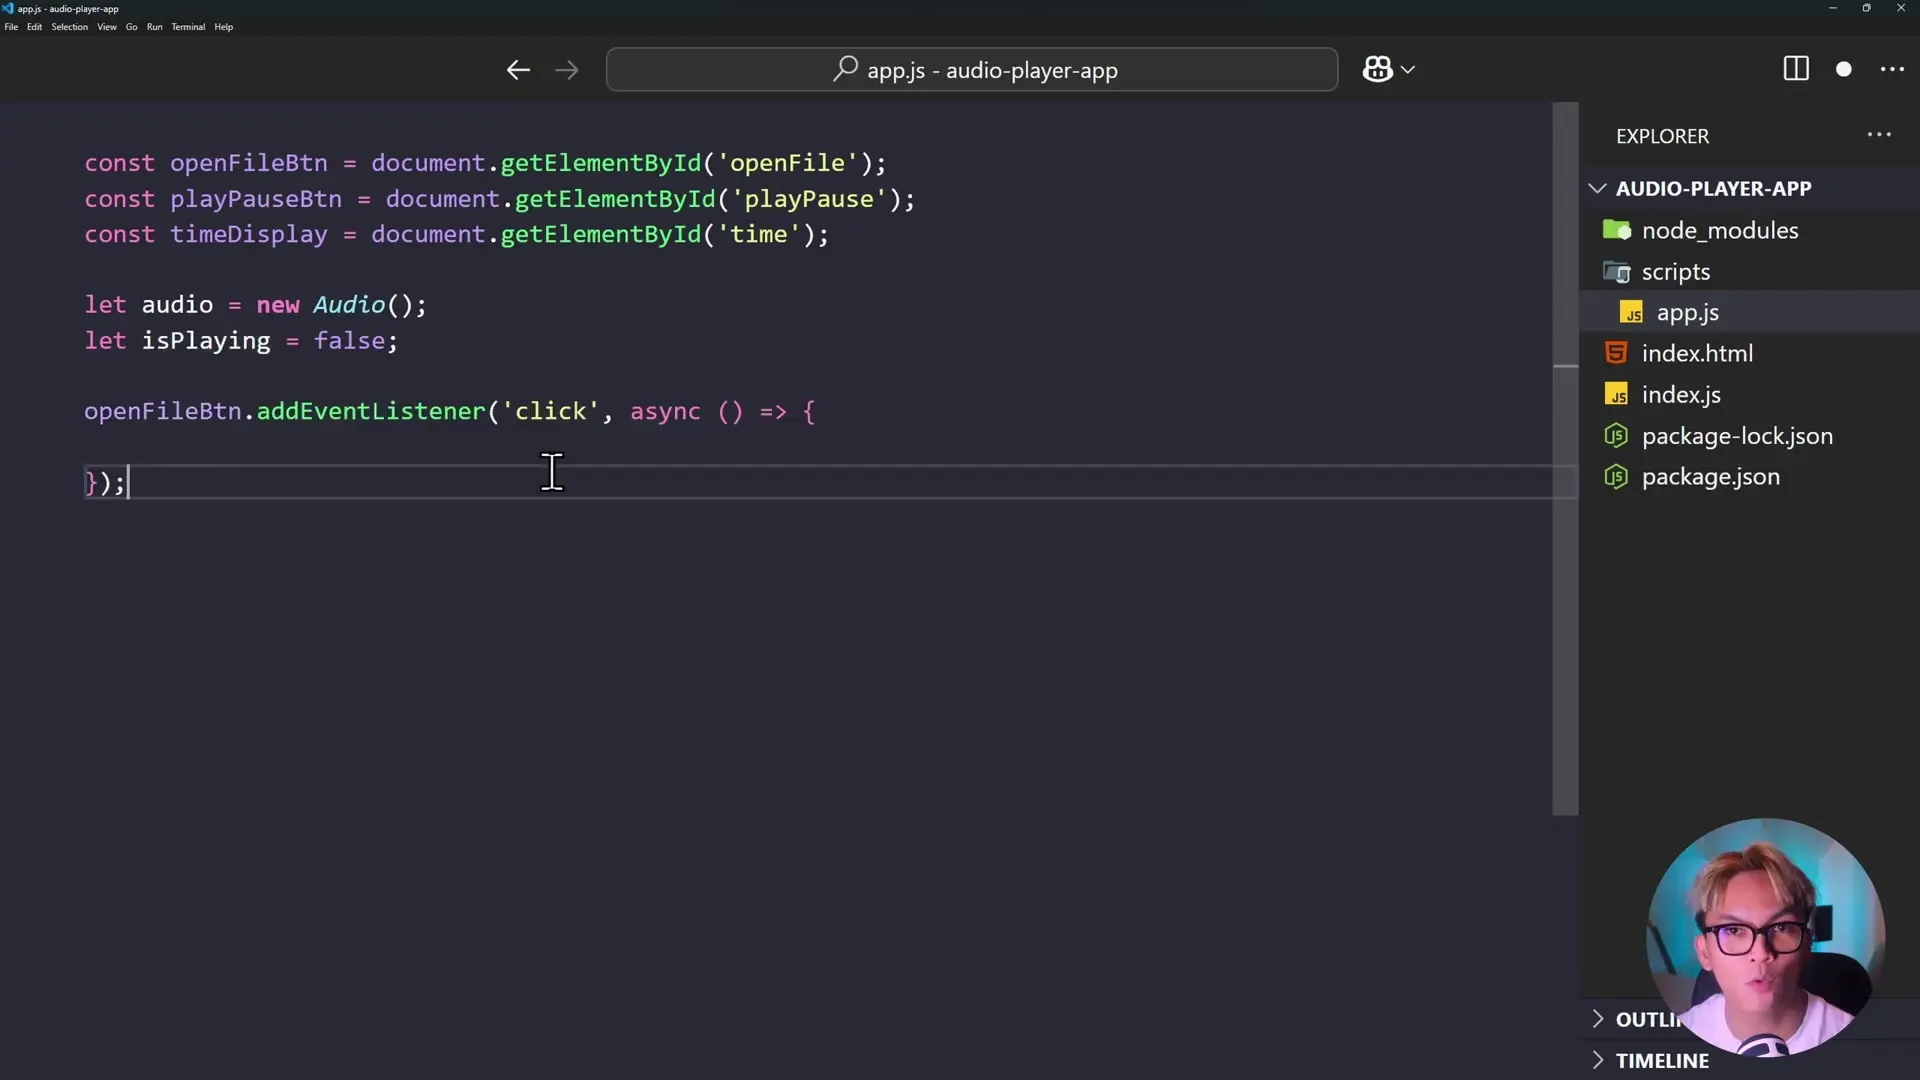
Running Your Electron Audio Player App
Now that we have all the necessary files, let's run our application:
npm run startYou should see your audio player application launch. Click the "Open File" button to select an audio file, then use the "Play" button to start and pause playback. The time display will show the current position and total duration of the audio track.
Packaging Your Electron App for Distribution
While not covered in detail here, the next step would be to package your application for distribution. Tools like electron-builder, electron-packager, or electron-forge can help you create installers for Windows, macOS, and Linux.
npm install electron-builder --save-devYou would then add configuration to your package.json and build commands to create distributable packages for different platforms.
Conclusion
Electron.js provides a powerful framework for building desktop applications using web technologies. In this tutorial, we've built a simple audio player that demonstrates the core concepts of Electron development: creating windows, loading HTML content, communicating between processes, and accessing native functionality.
This is just the beginning of what you can do with Electron. You can extend this application with features like playlists, visualizations, or integration with online music services. The combination of web technologies and desktop capabilities makes Electron an excellent choice for developing cross-platform applications.
Let's Watch!
Build Your First Desktop App with Electron.js in 10 Simple Steps
Ready to enhance your neural network?
Access our quantum knowledge cores and upgrade your programming abilities.
Initialize Training Sequence